The Ultimate Guide to Crawlspace Encapsulation: Why We Are Your Best Choice

The Ultimate Guide to Crawlspace Encapsulation: Why We Are Your Best Choice

The Ultimate Guide to Crawlspace Encapsulation: Why We Are Your Best Choice

By Walsh Crawl Space | Published on October 16, 2024


Crawlspace encapsulation is an essential service for homeowners looking to protect their property from moisture, mold, and pests. This guide explores the importance of encapsulation, how it works, and why it's critical for your home’s structural integrity and indoor air quality. Read on to learn why Walsh Crawl Space is the best choice for professional encapsulation services.

What is Crawlspace Encapsulation?

Crawlspace encapsulation involves sealing a crawlspace with a durable vapor barrier, insulation, and other materials to protect the area from moisture, mold, and pests. This process includes covering the floor, walls, and vents with a heavy-duty liner, which acts as a barrier against outdoor elements. Encapsulation not only prevents moisture but also enhances indoor air quality and energy efficiency by maintaining a dry environment. For more details, visit our page on Crawlspace Encapsulation Process.

Purpose of Crawlspace Encapsulation

The primary purpose of crawlspace encapsulation is to create a clean, dry environment under your home. By reducing moisture and humidity levels, encapsulation helps prevent issues like wood rot, mold growth, and pest infestations. Additionally, an encapsulated crawlspace can make your home more energy-efficient by reducing drafts and providing better temperature control. Encapsulation also adds value to your property, as it signifies to potential buyers that the home has been well-maintained and protected from common issues associated with open crawlspaces.

Importance of Crawlspace Encapsulation in Home Maintenance

For many homeowners, crawlspace encapsulation is a game-changer in home maintenance. Traditional crawlspaces often have poor ventilation, leading to moisture buildup, which encourages mold, mildew, and even termite infestations. Encapsulation addresses these problems by keeping the crawlspace clean, dry, and sealed off from the external environment. To learn more about the long-term benefits of encapsulation, check out our Benefits of Crawlspace Encapsulation.

Step-by-Step Guide to Crawlspace Encapsulation

At Walsh Crawl Space, we follow a detailed encapsulation process to ensure your crawlspace is completely protected. Here’s a step-by-step overview of what’s involved:
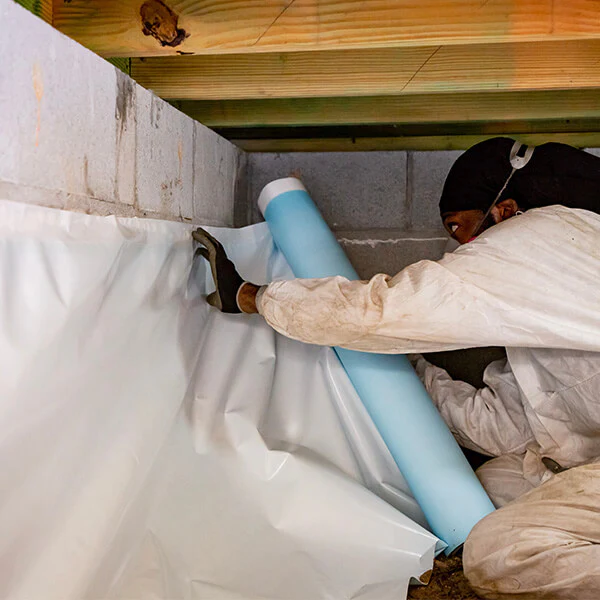
  1. Inspection and Cleaning: We start by inspecting the crawlspace for any debris, old materials, or signs of damage. Remove any old insulation, debris, and fix any structural issues to create a clean surface. If mold is detected, we treat it thoroughly before proceeding. For further guidance on the inspection and cleaning process, visit Home Inspection Insider.
  2. Sealing the Vents and Openings: Seal the crawlspace vents and any openings with foam insulation or foam boards to keep outside air, moisture, and pests out. Foam spray and construction tape are commonly used for this purpose, ensuring all gaps are sealed to maintain an airtight environment. Learn more about this step on Wiggly Wisdom.
  3. Insulating the Walls: Adding insulation to the crawlspace walls helps maintain a stable temperature and reduces energy costs. Use foam board or spray foam insulation on the walls and around the rim joists to further protect against heat transfer and moisture buildup. Find additional information at Stego Industries.
  4. Installing a Vapor Barrier: Apply a durable vapor barrier across the floor and walls, overlapping the seams by 6-12 inches for complete moisture protection. This thick plastic sheeting is key to controlling humidity and preventing ground moisture from entering the crawlspace. To ensure longevity, consider reinforced vapor barriers, especially for rough ground surfaces. More details are available at Crawlspace Insider.
  5. Encapsulating Columns and Piers: Wrap the support columns with the vapor barrier, making relief cuts where necessary. Secure these wraps with seam tape, ensuring a tight fit to keep moisture from infiltrating through the columns. For a step-by-step approach, visit OK Foundation Solutions.
  6. Installing a Dehumidifier and Ensuring Proper Air Flow: To maintain dry air and prevent mold growth, a dehumidifier is often recommended. Set it to maintain humidity levels between 30-50%. This step is especially crucial in areas with high humidity and can be discussed further with a crawlspace expert. Find out more about this final step at Stego Industries.
Diagram of Crawlspace Encapsulation Process

Our Encapsulation Process: At Walsh Crawl Space, our process involves high-quality materials, expert installation, and a commitment to delivering lasting protection. Contact us today to learn more about how we can help protect your home.

Key Points to Remember

  • Crawlspace encapsulation protects against moisture and improves air quality.
  • It can enhance energy efficiency, reducing heating and cooling costs.
  • Encapsulation prevents pest infestations and structural damage.
  • Professional installation is key to effective and long-lasting encapsulation.

Frequently Asked Questions About Crawlspace Encapsulation

What is crawlspace encapsulation?

Crawlspace encapsulation involves sealing the area under your home to prevent moisture, pests, and other issues from affecting your property. This process usually includes a vapor barrier and insulation.

Why should I encapsulate my crawlspace?

Encapsulation helps prevent mold, rot, and energy inefficiencies, enhancing the health and longevity of your home. It also reduces indoor allergens, making your living space healthier.

Don't Let Leaks Weaken Your Home's Foundation

Contact us today to schedule a free inspection.
Contact Us
cross linkedin facebook pinterest youtube rss twitter instagram facebook-blank rss-blank linkedin-blank pinterest youtube twitter instagram